Achieving a high-gloss finish is the aspiration of many in automotive restoration, woodworking, and other DIY projects. Whether you’re painting a vintage car, refinishing furniture, or sprucing up home decor, getting that glossy, showroom-quality look requires more than just slapping on some paint. The secret to a flawless finish lies in the application of a 2K clear coat. Known for its superior durability, depth, and shine, 2K clear is a professional-grade finish that offers both aesthetic appeal and long-lasting protection. In this guide, we will walk you through the process of applying a 2K clear to achieve that mirror-like high-gloss finish.
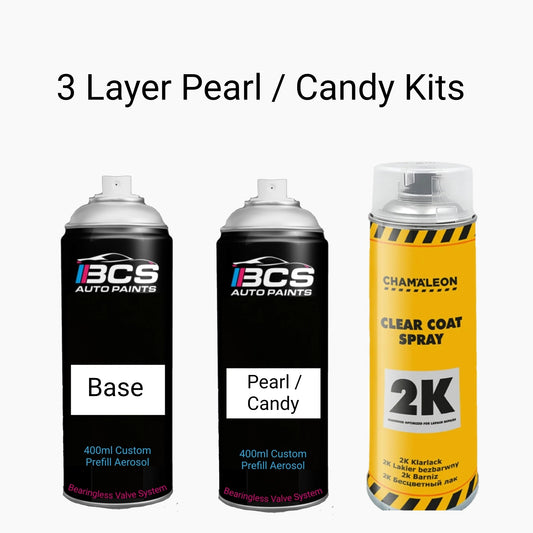
What is 2K Clear Coat?
Before diving into the steps of achieving a high-gloss finish, it’s important to first understand what a 2K clear is. The term “2K” refers to a two-component system: the clear coat itself and a hardener (activator). Unlike single-component (1K) clear coats, which dry and cure through evaporation, 2K clear cure chemically when the hardener is mixed with the clear coat. This chemical process results in a tougher, more durable finish, perfect for achieving a high-gloss shine.
2K clear are typically used in automotive applications, furniture refinishing, and other projects where both a high-quality finish and protection are required. Once applied, the clear coat forms a hardened layer that is resistant to environmental damage, UV rays, scratches, and chemical wear. This makes it ideal for surfaces that need a shiny, robust coating capable of withstanding the test of time.
Why Choose 2K Clear Coat for a High-Gloss Finish?
2K clear is considered one of the best choices for those aiming for a high-gloss finish, and here’s why:
- Superior Durability: One of the primary reasons to choose 2K clear over other options is its exceptional durability. The chemical reaction between the hardener and the clear coat creates a tough, resilient finish. This results in a surface that is not only glossy but also resistant to scratches, chips, and environmental factors.
- Unmatched Gloss: The curing process of 2K clear helps create a smooth, glass-like finish. The result is a high-gloss, mirror-like shine that looks professional and polished.
- UV Protection: 2K clear contains UV inhibitors that protect the surface from sun damage. Over time, surfaces treated with 2K clear will retain their vibrant, glossy appearance, even in the harshest conditions.
- Chemical Resistance: Whether it’s cleaning products, fuel spills, or weather conditions, 2K clear coat offers resistance to many harmful chemicals that could damage your surface. This makes it a great choice for automotive and industrial applications.
- Versatility: 2K clear is suitable for use on various surfaces, including metal, plastic, and wood. It’s ideal for automotive finishes, furniture restoration, and even custom DIY projects.
How to Achieve a High-Gloss Finish with 2K Clear Coat
Achieving that glossy, high-end finish with 2K clear is a detailed process that requires patience and precision. Below, we’ll guide you through each stage, from surface preparation to final polishing, ensuring you end up with a smooth, reflective surface.
Surface Preparation
The first and most important step in achieving a high-gloss finish is ensuring the surface is clean and smooth. Any imperfections in the surface will be magnified after applying the 2K clear, so it’s essential to spend time on this step.
- Clean the Surface: Start by thoroughly cleaning the surface you plan to coat. Remove any dust, dirt, grease, or other contaminants that could interfere with adhesion. For automotive projects, this means washing the car and using a degreaser to remove oils or waxes. For furniture, a simple soap and water solution will suffice. Allow the surface to dry completely.
- Sand the Surface: If you’re working with an existing paint job, sand the surface lightly with fine-grit sandpaper (400-600 grit). Sanding helps to remove any imperfections and provides a smooth, scuff-free surface that the 2K clear coat can adhere to. If you’re working on bare metal or wood, ensure the surface is smooth before moving to the next step.
- Apply a Base Coat (If Necessary): If you’re working with bare surfaces like metal or raw wood, you’ll need to apply a base coat first. Choose a base coat that is compatible with the 2K clear you’re using. Ensure the base coat is smooth, dry, and fully cured before proceeding to the next step. If you’re already working on a painted surface, skip this step.
Mixing the 2K Clear Coat
The next step involves mixing the 2K clear with the activator or hardener. This part of the process is essential for the clear coat to cure properly.
- Check the Manufacturer’s Instructions: Different brands of 2K clear have different mixing ratios. Always check the manufacturer’s instructions to ensure you’re using the correct ratio of clear coat to hardener. Most 2K systems call for a 2:1 or 4:1 ratio.
- Mix Thoroughly: After measuring out the correct ratio, combine the two components in a clean mixing container. Stir the mixture thoroughly for several minutes to ensure the hardener is evenly distributed throughout the clear coat. If the mixture isn’t well-blended, you may encounter issues with curing or gloss.
- Let the Mixture Set: After mixing, allow the clear coat to activate. The activation time usually ranges from 20 to 30 minutes, depending on the brand. This waiting period allows the hardener to properly react with the clear coat.
Applying the 2K Clear Coat
Once the clear coat and hardener have been mixed, it’s time to apply the finish. For the best results, apply the 2K clear coat in thin, even layers.
- Use a Spray Gun: For automotive projects or large surfaces, it’s best to use a spray gun to apply the 2K clear. A high-quality spray gun will provide a smooth, even coat. Choose a gun with a nozzle that is appropriate for clear coat applications.
- Apply Thin, Even Coats: Begin by applying the first thin layer of clear coat. Hold the spray gun about 6-8 inches from the surface and spray in even, overlapping passes. The goal is to apply a mist-like coat that covers the surface lightly without any heavy buildup. After the first coat, allow it to dry for 10-15 minutes before applying the next layer.
- Build Layers Gradually: After the initial coat, apply additional layers. The second coat should be a bit heavier, but still thin. Continue layering until you achieve the desired gloss. Typically, three to four layers will be sufficient to achieve a high-gloss finish.
- Let the Clear Coat Dry: Once you’ve applied all your layers, allow the clear coat to dry fully. Curing time depends on temperature and humidity, but it’s generally best to wait 24-48 hours before handling or polishing the surface. Avoid exposing the freshly coated surface to moisture or dust during the drying process.
Polishing for a Mirror-Like Finish
After the clear coat has dried, the next step is polishing. This step helps smooth out any imperfections and enhances the gloss.
- Wet Sanding: If the surface feels rough or has an orange peel texture, use wet sanding to smooth it out. Start with a 1500 to 2000-grit wet sandpaper and sand the surface lightly in circular motions. Keep the surface wet during sanding to avoid scratching.
- Polishing Compound: Once the surface is smooth, apply a polishing compound with a soft microfiber cloth or rotary buffer. This helps bring out the high-gloss shine. Work in small sections to ensure even coverage.
- Final Buffing: After polishing, use a clean microfiber cloth to buff the surface to a mirror-like finish. Buffing helps remove any remaining compound and brings out the full depth of the gloss.
Protecting the Finish
To maintain that high-gloss finish, proper care and maintenance are essential.
- Avoid Harsh Elements: For the first few weeks, avoid exposing the freshly clear-coated surface to harsh sunlight, rain, or extreme temperatures. This gives the clear coat time to cure fully.
- Wax the Surface: Apply a layer of car wax or furniture polish to protect the surface and keep it glossy. This will also help prevent minor scratches and stains from forming.
Conclusion
Achieving a high-gloss finish with 2K clear coat may seem like a challenging process, but with the right tools and techniques, you can achieve professional-quality results. From preparing the surface to mixing the clear coat and applying it in thin, even layers, every step contributes to that stunning, mirror-like shine. By following these steps and allowing the proper drying and curing time, your project will boast a durable, glossy finish that will last for years to come.
Embrace Your Curves Top Trends in Plus Size White Dresses for 2025